...family, friends, home and other tidbits of a blessed life
Showing posts with label embroidery. Show all posts

Saturday, January 4, 2014

Easy Embroidery - How to Embroider Napkins

I want to share with you a quick and easy way to embroider napkins.

Let me preface by saying that I've had 20 or so years of embroidery experience. Wow, it's really been that long! I've learned the "correct" way to embroider, which stabilizer to use, which needles, which threads, for so many instances. Over the years, I've also learned which shortcuts I can take.

This is the way I embroider napkins, and many will say it's totally wrong, but it works for me, so give it a try, you might you like it, too. You'll notice I don't "hoop" the napkin. For me, I can get as good a result using this technique and I find it much easier than hooping the napkin, especially when some of the napkin won't be in the hoop anyway or even reach the hoop in others. Practice with this technique and you might just see that it will work for you! ;-)

  1. Open the embroidery design in embroidery software.
  2. Add a monogram if desired, shown in sample.
  3. Print two copies of the design in actual size, with center marks, and with the hoop printed.
  4. Tape one copy of the design template to your work table. 

Tip: I like to tape the design to a cutting mat so that I can align the design (and later hoop with the grid lines)

  1. Cut the second printed template around the embroidery motif as shown above. No need to be exact.
  2. Pierce the center of the design with an awl, this will keep the marking pen from making the hole larger with each time you mark a napkin.
  3. Place the  cut out design into position in the corner of an ironed napkin.
  4. Use a ruler to keep the center guide lines equally aligned to both sides of the corner.
  5. Mark the center of the design with a water soluble marking pen made for fabric.

Tip: I never, ever use a purple air soluble marker. I have had the spot remain on colored linen. I prefer to use the blue water-soluble marker, always.

Fold the napkin back with the center mark as a guide, as to how much and keep the finished edges aligned, seen bottom right of the above image.


Note how the fold is through the blue water soluble mark.

For this technique, I use a Heat Away Clear Film stabilizer. It literally melts at the touch of an iron. This way there is no remaining stabilizer on the back side of your napkin. Another option is to use a water soluble Mesh Rinse Away. If using the Mesh stabilizer, then darken the cross hairs of your printed design.

  • Hoop the stabilizer very taut.
  • Place the hoop on the taped down design template, following the hoop layout. 
  • Align the hoop carefully as this will have a direct impact on the outcome of your design. 
  • Double check that the hoop center markings are properly aligned with both the cutting mat and the paper template.

Tip: If you are embroidering satin letters that have a wide satin stitch, Heat Away Clear Film might not be the best stabilizer for that type of embroidery. Always, always do a test stitch out first.

  • Spray the hoop area with a temporary spray adhesive. I now exclusively use Mettler Web Bond Temporary Adhesive Spray. Here's a video on the product.. It doesn't smell and although there is a bit of adhesive that will stick on your needle, it's easy to remove with your fingers.

  • Place the folded napkin, wrong side down, folded piece on top, along the center line of the hoop and aligned with the cross hairs of the printed page.


Look for the blue dot of the center of the marked design and see how it is aligned with the center of the printed design and centered in the hoop.

Tip: You may need to practice this a few times to feel comfortable with this method. If you lift up the napkin and need to reposition it, then check hoop alignment with the printed template again and also see if there is still enough adhesive to hold the napkin securely and if not, then respray the adhesive.

  • Open the fold of the napkin, smoothing the napkin on the adhesive covered stabilizer.
  • Place the hoop on the embroidery machine.

  • Load the design into your embroidery machine.
  • Specify that the machine place the needle in the center of the design, not the beginning.
  • Adjust the positioning so that the center of the design is aligned with the center mark you made earlier.

Embroider away!

Tip: along with testing the stabilizer, I usually stitch out a test to see how the colors I have chosen work on the design. Your machine is really color blind and you can substitute any color you want for those designated in the design instructions. :-)

How pretty your table will be with your special napkins! They don't really need any special care.
  • Always iron from the design area on the wrong side so that the design area maintains a bit of a raised design.
  • I save my rayon threads for items that will be used gently. I use Isacord embroidery thread for napkins, childrens clothing and many other items.
  • If I am embroidering with metallic threads (don't groan), then I use Yenmet metallic thread
  • I also use Organ embroidery needles exclusively. They are less costly and give superior results than most other needles. Their eye is larger so there is less friction on the embroidery thread as it goes through the needle. If your design has thousands of stitches and each stitch passes through the needle 3 times, you can imagine the havoc a poorly chosen needle with have on the outcome of your project.
  • The design was embroidered using Melt Away stabilizer, Isacord threads and a size 80 Organ embroidery needle.
  • The design can be found: https://www.embroiderydesigns.com/productdetails/sweet-heirloom/stockdesign/1/she0285_010.aspx

Monday, March 25, 2013

A Walk through my Garden

I changed out the quilts hanging in the studio. Something lighter and more spring-like.

Luckily, I label my quilts. Made this in 2001. For a Bernina publication. Was it A Touch of Artistry? How can I not be sure? Woe be me. 

I embroidered the flowers on stabilizer only and then used a heat tool to melt the stabilizer away from the embroidered piece so that all the embroidery were separate pieces. I could layer and add at will.


I used free motion stitching, straight line stitching, stitch in the ditch quilting. One of my favorite things is how the piping peaks out of the binding. 

I also couched some threads down around the center. I'm all about texture!!

Those decorative stitches on your machine are just dying to be used.. Let them out, they can create some fun pieces of art!

Update: I found the publication in which this quilt was featured.

Available HERE.

Wednesday, February 13, 2013

A Valetine's times two tablescape

What's in a name? Oh I know Shakespeare has the answer, but that's not where I'm going!
The ever so delightful and ueber-talented Cherry Kay from Entertaining Women blog is my partner at the table setting party tonight!  

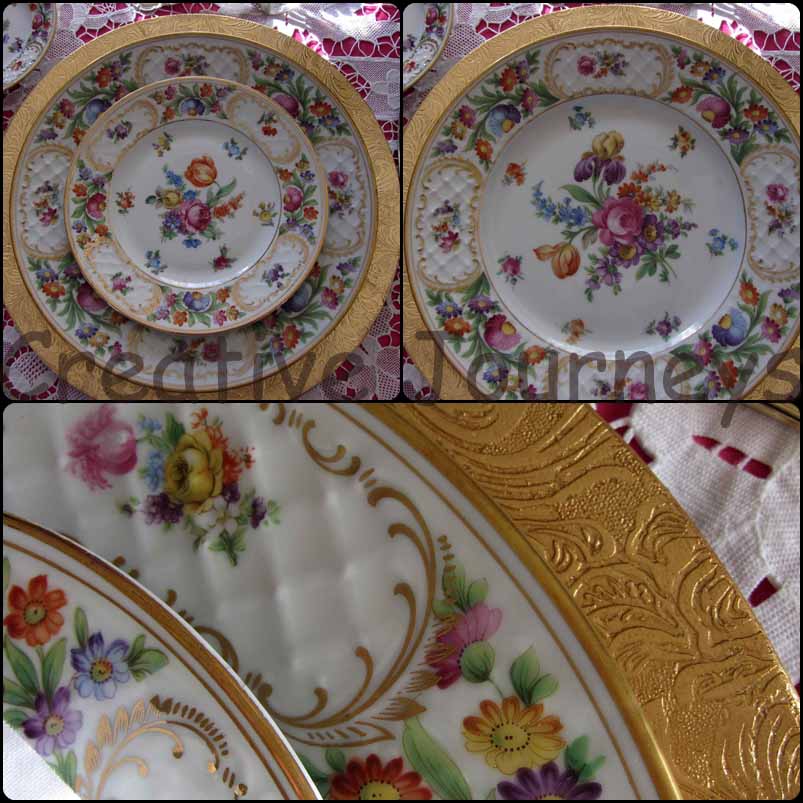
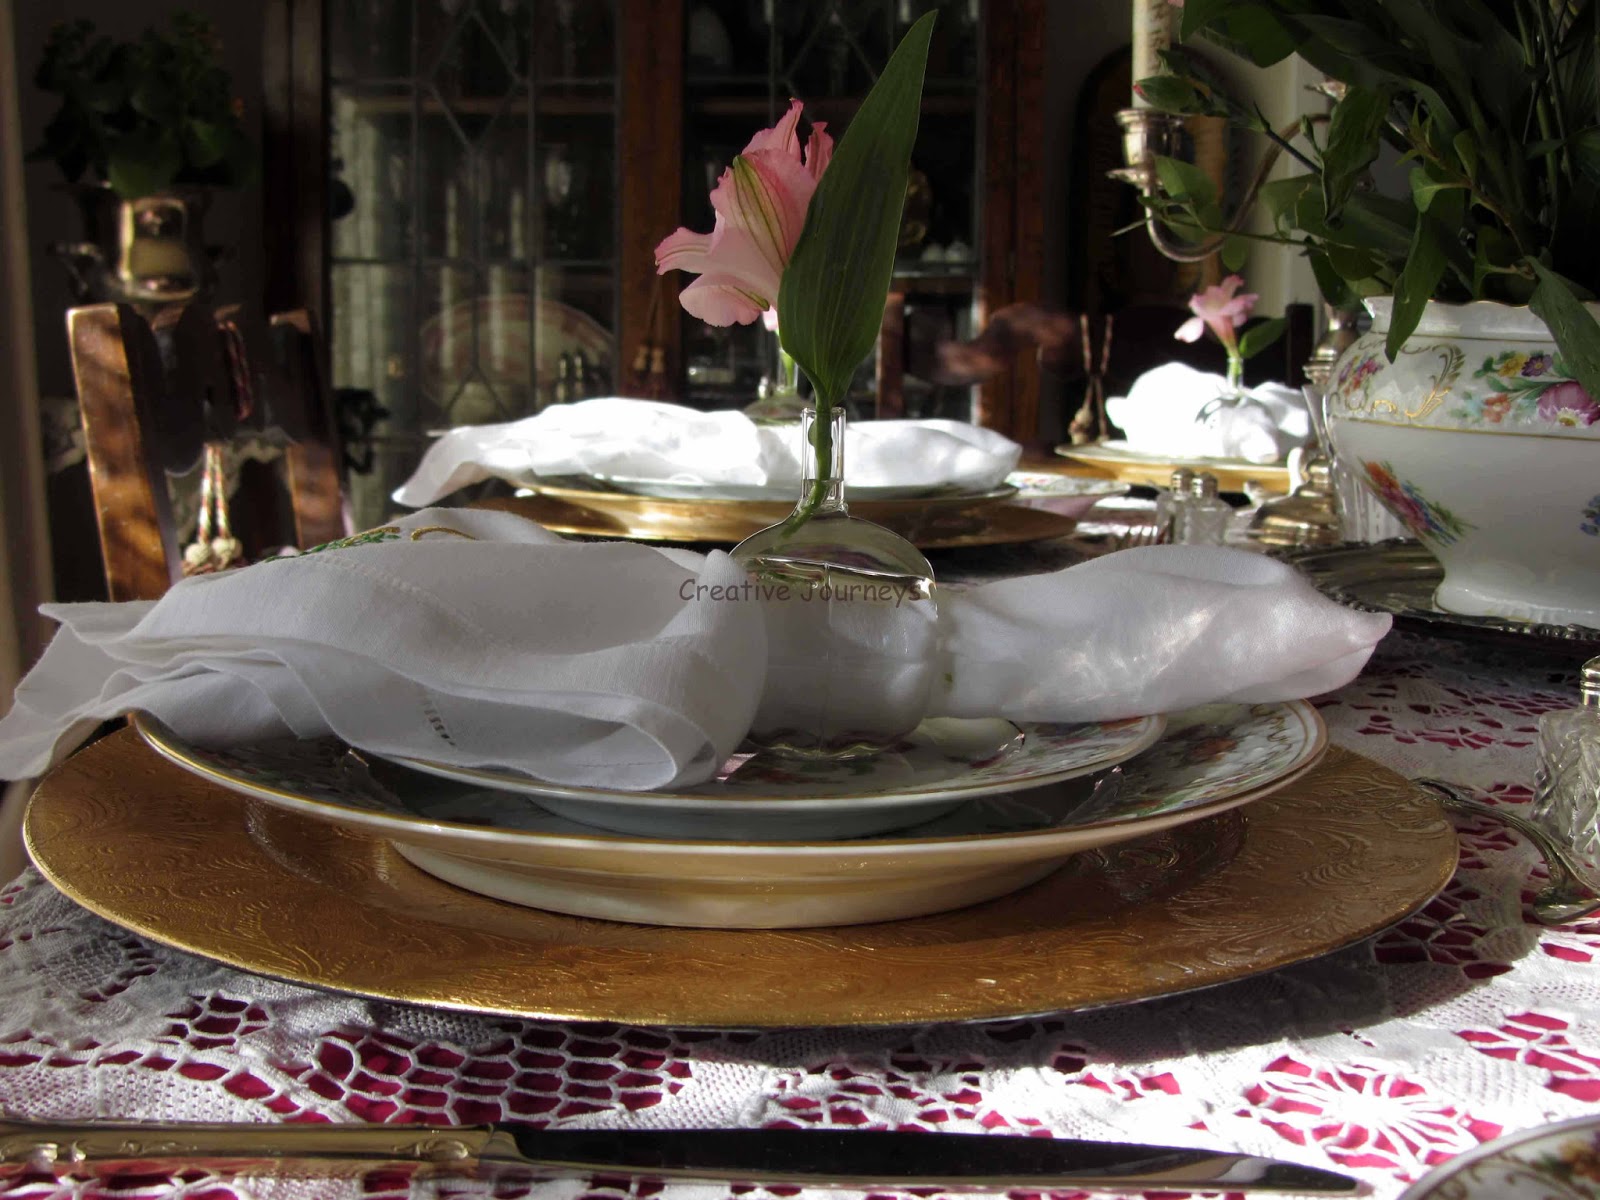
 We chose to use our Schumann Dresden dishes. I've used them before HERE and HERE. And I just realized I used the same tablecloth from one of the tables. But with a twist. I paired them with a gold charger today and used gold flatware. 

We actually used this table last Sunday evening. So I didn't use a lot of any hearts. Shame on me. 


In their stead, I used some vase napkin rings to reign in the napkins, freshly embroidered. In each vase, I inserted a single alstroemeria blossom.

I love how the sweet blossoms present their precious heads far above the plates.

Now don't laugh.. but I have a confession to make. I'm sure this has never happened to anyone else. Ever. I probably took the first 20-30 pictures of the table.... sans glasses!! Yep, as I was fixing dinner, I noticed my omission. And sprung into action and pulled out some glasses. I'm sure the guests would have just had a good laugh and dinner would still have been a success! I wonder if I would have laughed at myself.

I placed a hot pink tablecloth under the lace to set the tone for the table. 

By this time the late afternoon sun was streaming in the window and there was no
 way to avoid the sun dance!

I used the silver candelabras on the table. I think it's perfectly acceptable to mix metals. 
What do you think?

Because all good things are in 3's... the silver plateau found it's way under the bouquet of flowers. Which, truth be told might be a tad bit high, but everyone could still be seen over them, and conversation flowed as freely as ever.

I think the lace, embroidery and crystal help give the table a very romantic look, even without hearts. What do you think?

I love how crystal seems to come to life when the sun or lighting hits it just so.

Finding flowers for the centerpiece proved a bit of challenge. Here's a tip.. take a picture of the dishes, carry it with you and then hold it up to the flowers in the store. It's amazing what pops out at you when you do that. 

No roses, but every color in the bouquet is in the dishes.

Because Cherry Kay often uses soup tureens as centerpieces; in her honor, I used the matching one to the dishes to sit in as a container for the flowers this evening. 

The silver butter dish and the Lenox swans add a bit more jewelry to the table.

After the near disaster of the missing glasses, I didn't take any pictures with the candles lit that evening. Too busy with guests and getting our dinner of pecan crusted trout, garlic roasted red potatoes, steamed broccoli with hollandaise sauce on the table. Our first course was a fresh mixed lettuce salad with vinaigrette. And to follow all this up, I served a mixed berry dessert over which I spooned a tequila cream sauce. Yummy!

I hope you will find your way over to Cherry Kay's to see her table, which I might say is absolutely fabulous. She, too, chose pink as a backdrop.. but oooh with just her special touches, it looks so stunning.  You do know that it was her gentle nudge that pushed me ever so gently into forward motion and got me collecting these beautiful dishes. So it was fitting we teamed up to bring you a duo of tables for Valentine's. 


Wishing all of you a Valentine's day full of happiness and joy. It's not the big things that matter, but all the little things that happen along the way that really make a difference. So single, in a relationship or married for eons; do something fun, enjoy the day and buy yourself flowers if need be.

Cast:
Chargers - Hobby Lobby
Dishes - Antiques, Schumann Dresden (ebay)
Flatware - International
Water goblets - Mikasa Parklane
Wine glasses - Libbey Rock Sharpe
Silver candelabra, silver plateau - antique 
Lenox swan salt cellars - Lenox "To the Bride"
 Embroidery design - Sonia Showalter designs

 Joining the party over at Cuisine Kathleen's - Let's Dish - on Wednesday evening


Tuesday, July 24, 2012

Chris✞mas in July - Handcrafted Gifts


Chris✞mas in July continues.. Yvonne at Stone Gable has come up with a great idea to get us ready for the holidays. She is has a party going on this week to bring us some holiday cheer early in the year. Are you ready?


The believe banner is located HERE


I love new door danglers.. this would be a great idea. For me see HERE.


A new Advent calendar is always much appreciated. This is a two part post HERE and HERE.


Or a really cute idea to help show off the pictures, seen HERE.

Or embellish a tablecloth for your best friend. I know she will love it. Seen HERE

Hoping you got some good ideas.. Had fun having you here..
 

LinkWithin

Blog Widget by LinkWithin