
I hadn't planned on posting my 2018 Alpine Christmas Village, yet here we are!
The first picture is a video that I took before I let it snow on the village. Wish I had thought to make another video.
I had The Dept 56 Dickens Village which I started with Scrooge's house when it first came out. Scrooge was the winner from all the pieces because my husband sees $$$ at Christmas and i just see the joy. Then in 1999, we lost our house to a fire and with it the Dickens village went up in smoke.
I tried to get back into it, even when the boys gifted me new pieces, but it just wasn't there.

Then fast forward 12 or so years and the son arrives at the house in his pickup and the bed it full. Dad had sent my mother's village pieces and all the accessories with him to make this special delivery. At first I was hugely overwhelmed. I found so many doubles, pieces from different villages, and a massive amount of trees along with mountains, trains and people.

I did have the perfect spot to set it up, although it is not without it's limitations. In our long hallway, which is full of built-ins that house most of the china, linens and table accoutrements, there is a nice shelf. If placed there, I thought it wouldn't get in the way of living. No need to rearrange furniture! And our cat is pretty good about not getting on anything on which something is. The first year i set it up was nothing as it is now. I used snow looking batting as a base.

While the depth is shallow, just shy of 22", the length is substantial at more than 18 feet.
The window is a challenge, and I 'll show why in a bit. This is the year I lost my marbles and decided I wanted a layout that had realistic scenery. Think of the big train layouts, but in snow and with houses.

The first task is to unbox the houses and accessories and decide on placement. I chose to have farmland on the right, merging to old town, the train station, town center, on to a section that I've dubbed Vail and finishing off in the mountains. Once the placement is decided then you can venture along this abyss and start the design of the landscape. It did take 4 months to complete the village. The next time i put it up, if I don't change it too much, it should be rather quick. Well, less than 4 months anyway.

And what could i do to add some more light on the subject (there are no lights over the shelf and I am pretty sure even today, my husband wasn't going to bring in an electrician! So I went with white garland and this beautiful snowflake strands. They were at both Hobby Lobby and Lowe's Home Improvement, but the price was better at HL and with a coupon, they were reasonable.

The window proved challenging. What worked on the inside looked horrible on the outside. And then I bought sheet insulation and a "hotwire" tool to mold the mountains! I already had the Hotwire knife which cuts styrofoam into straight or curved lines, but it would not have worked for the face of the mountains.

I ended up watching a lot of youtube videos for lessons, ideas and implementation ideas. I built mountains (not the brown snow caps as those are Dept 56), purchased additional pieces and figured out the wiring (the hardest part!). Which meant purchasing some pieces that condensed 12 lighted houses to one cord.

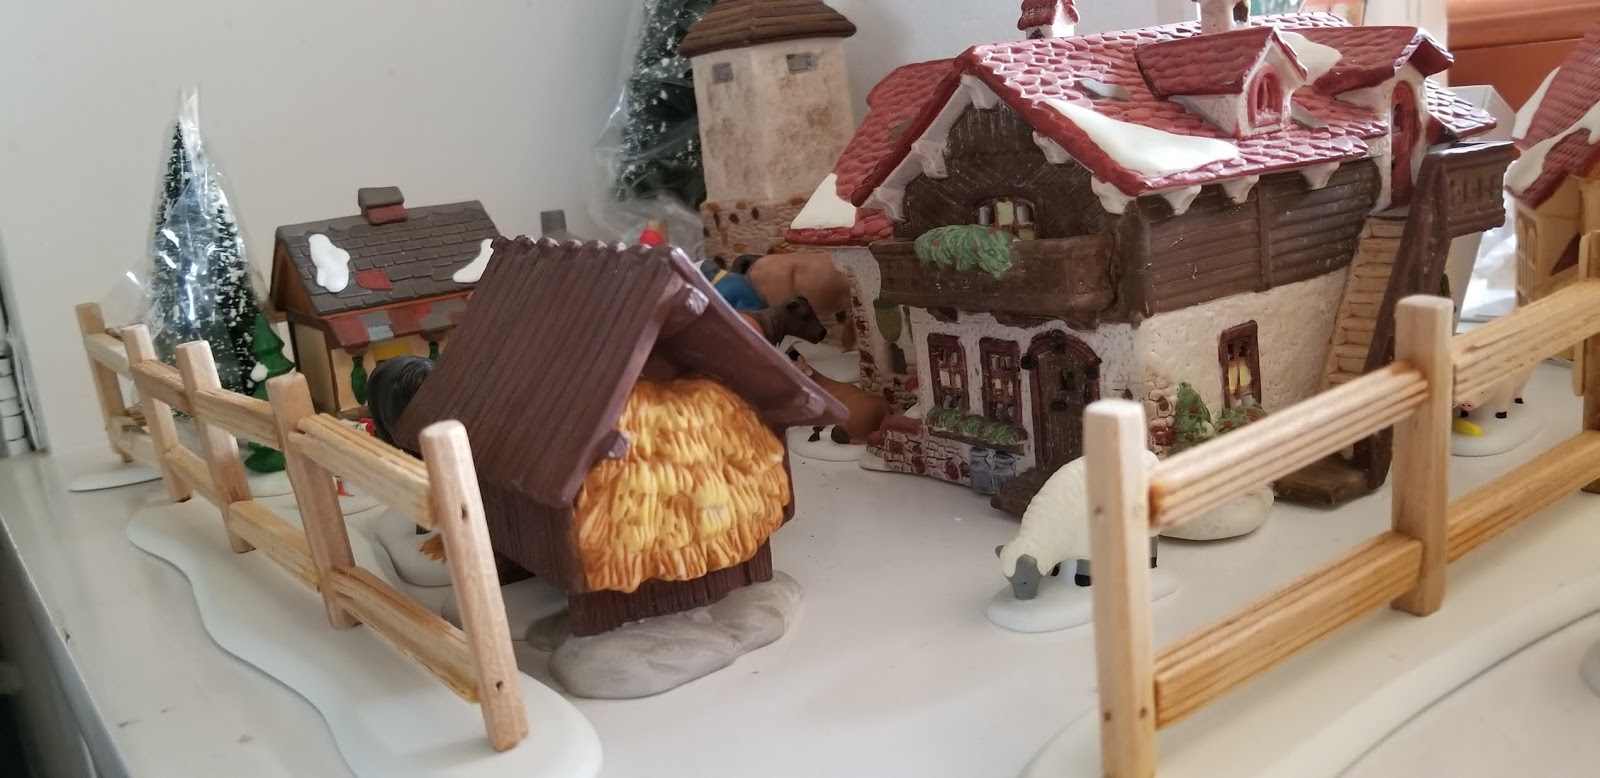
Above all, the process was a lot of fun. This section is the farm on the far left and the older pieces for "old town". The mountain climbers were stuck to the mountain with museum putty.

And throughout the process some things moved or got replaced. Insert huge eye-roll.

The sheepherders house was a new addition.

One of the 3 churches in the village.

An overview of the farm. So many pieces to put in that section!

Old Town.

I also replaced the well with this bell and children at some point.

From Old Town moving to the right, is a section with another church and in the background is the train station. I long ago gave up on the Dept 56 train as it's in HO gauge and this village is more of an O gauge which is slightly larger. I needed to be able to wind up the little chapel in the front left so accessibility dictated it's position.

Can you spot the guy on a bench reading the times? Mine is very cosmopolitan alpine village. The train brings in news from around the globe.
 We are now entering into town center. There is a toy store and restaurant and a beer vendor in this area.


Between pictures I added the Russian wooden tree. It's
very similar to the Russian matryoshka dolls as it is nesting and has pieces inside. If I remember a toy and a snowman? It was purchased in Santa Fe, NM at The Shop, A Christmas Store.

At the back of Town Center is a row of houses on a riser. The front looks like stacked rocks and the top has a walkway and concrete/ The fence is attached with museum putty and at this point, I had the daunting task of figuring out what to do with the wiring for the lights! Styrofoam is great, poke a hole and stuff it in!

Depending on the time of the picture, some of these houses might have morphed. Been removed and a new one put in it's spot. The fence is from Michael's as I didn't think Dept 56 had one that would not obstruct the view.

I also purchased the tree from Michael's, it's lit and I added the red balls.

I had purchased all the market stalls for a Christkindle Markt and I knew I wanted the Christmas market to be front and center. It's the one Christmas tradition I miss the most from Germany.

There is always a main entrance to the market and I really wanted to make something since I could not find anything that would work. Two spools and some greenery and lights later, the entrance came to life. In this picture the entrance still has a tree, in the next the tree was traded for a fountain.

The fountain lights up, but since it was a later addition, it missed getting power.

Still moving right, there is a beer hall with an outdoor seating area. In Europe, you will find people sitting outside throughout the year. Just passed the beergarden you get a glimpse of the trolley that is in H gauge and much better suited to the village pieces. I needed to choose something that didn't need a circle track but instead would go back and forth. This fit the bill.
I could not find a Dept 56 one, so I searched for other options. Lionel makes one. The one I chose is a Bachman. One day I might get the Lionel because you can give station calls that you record.

I made the umbrellas out of party umbrellas. These had a longer stem so they worked fine. I covered the tops with fabric. Perfect spot for the beer drinker and barmaid!

I found the dog digging in the trashcan at Michael's and added a new label in German.

We are now entering one of my favorite parts of the village. The first trip my husband and I went on together was to Vail. Although I was disappointed as everyone had hyped it to be a little Germany, it was obvious these poor souls had never been. I do so love Vail, but a little Germany it is not. This section reminds of Vail with it's covered bridge, stream and timbered buildings.

Here you can see the pattern of the cobblestone. It was all punched into the styrofoam insulation sheets with the eraser end of a pencil (eraser removed) after the shape was bent into the eraser holder. I then painted and aged with craft paints.

I found the Kiosk (round thing with placards on it between the fence and bench) and created some German placards and glued them on for a more authentic touch.


Towards the back is the Grist mill.

After many youtube videos and lots of debating, I did go ahead and carve out the river bed. Luckily I practiced first as you must line the carved out shell with a plaster compound, otherwise the liquid resin for the river will seep right through your hole-y styrofoam! Food coloring provides the color in the resin.

Man-made river in the front which goes under the covered bridge and emerged on the back side to a
Dept 56 stream in which a man is fishing in the middle of winter! Obviously he doesn't know that trout aren't biting at this time. But we are fisherpeople so that piece went in as well.
Moving past the river to the right are the mountains, with a ranger station, a castle , yet one more church, and some more fun accessories. There are several levels in this section. The big brown mountain is Dept 56 but the remainder are all me-made.


Deer, skateboarders and skiers are all represented here. The people sitting around the bonfire are not Dept 56 (I mix freely) and remind me of the best Christmas Eve ever at our mountain cabin with friends)

Our son Michael gave me this Old Michael's church soon after our house fire. I use it every Christmas and although it was a bit out of place in this setting, I left it until....


Couldn't resist the bears in the trashcan!

And then the church morphed! Dept 56 came out with this one and I love it. So it had to be placed into the village. Old Michael's church was on display in the entry.
I apologize for all the pictures, but I wanted to make sure that each section got it's due process and was well represented. I hope you enjoyed the time you spent here and have been inspired to take our your village and bring it to life.


